8-Inch Hub Motor Installation Guide: Standard Workflow, Torque Sequence & Troubleshooting
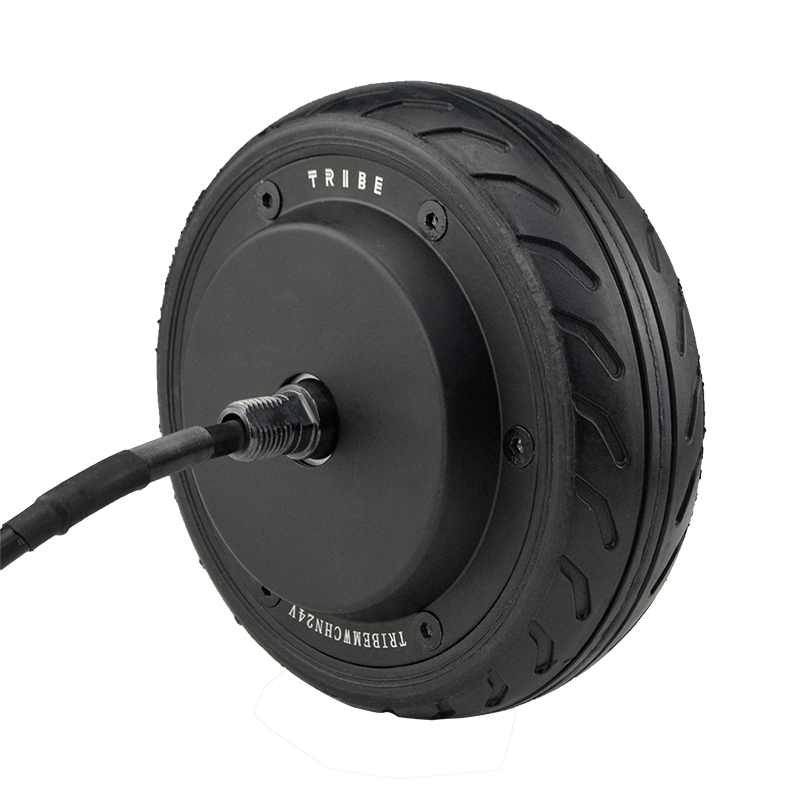
This guide is built for engineers and OEMs installing an 8-inch (200 mm) hub motor for the first time. It explains a standardized, repeatable installation workflow—from pre-checks and alignment to the correct fastening/torque sequence—supported by clear diagram-style steps to reduce assembly errors. It also covers wiring best practices, safety notes, commissioning tips, and practical troubleshooting methods for common on-site issues such as noise, overheating, vibration, and intermittent faults. Based on field-proven experience, the guide highlights how a no-secondary-machining approach can reduce rework, save build time, and improve delivery consistency. WWTrade also reinforces support readiness with documentation, integration guidance, and after-sales service to help teams shorten ramp-up time and achieve stable, optimized performance in real equipment deployments.

8-Inch Hub Motor Installation Pitfalls to Avoid: A Standard Workflow + Correct Fastening Sequence (Field-Proven)
This guide is written for engineers and OEM/ODM equipment makers installing an 8-inch (200 mm) hub motor for the first time—or standardizing assembly across multiple production lines. It focuses on the installation details that most often cause noise, overheating, premature bearing wear, loose fasteners, and controller errors.
The goal is simple: help teams achieve a repeatable, inspection-friendly process with no secondary machining, fewer reworks, and faster commissioning. For many compact mobility and light-industrial platforms, a standardized hub-motor installation can reduce assembly time by 20–35% and cut first-test failures by 30–50% when torque control and cable routing are managed consistently (typical factory observations).
Audience: OEM engineers • line leaders • integrators
Use cases: scooters • AGVs • service robots • carts
Focus: alignment • fastening order • wiring • debugging
Where 8-Inch Hub Motor Installations Typically Go Wrong (and Why)
An 8-inch hub motor is mechanically compact, but it concentrates loads through the axle, dropouts/torque arms, and wheel interface. Most failures don’t come from the motor itself—they come from integration details:
Top pitfall patterns seen in the field
- Misalignment at mounting faces → side-loads bearings, creates periodic rubbing and early wear.
- Incorrect fastening sequence → uneven clamp force, micro-movement, “mystery” squeaks, and fastener loosening.
- Over/under-torque (no calibrated tool) → stripped threads or insufficient preload; both increase failure risk.
- Poor cable routing / no strain relief → intermittent Hall/phase connection, controller errors, and insulation damage.
- Skipping insulation and continuity checks → nuisance trips, random faults, and avoidable returns.
Pre-Installation Checklist (Do This Before the Motor Touches the Frame)
Standardization starts before assembly. The following quick checks prevent 80% of “installation-caused” issues during commissioning.
Tools & process controls that matter
- Calibrated torque wrench (recommended calibration interval: every 6–12 months in production environments).
- Feeler gauge / straight edge for mounting face flatness checks (a simple “go/no-go” improves repeatability).
- Threadlocker policy (define where it is required; avoid “everywhere” rules that complicate serviceability).
- Multimeter for continuity and short-to-ground screening before powering the controller.
- Cable clamps + strain relief to prevent connector fatigue and wire pull-out.
Incoming inspection (practical and fast)
- Check axle flats/keys and mating surfaces for burrs; remove burrs only—avoid altering critical geometry.
- Spin test by hand: it should rotate smoothly with consistent magnetic cogging and no scraping.
- Connector pin check: confirm locking tabs, no pushed-back pins, no bent terminals.
- Verify harness length and routing path; define a minimum bend radius policy to protect insulation.
Standard Installation Workflow (Engineering-Friendly, Line-Friendly)
A good workflow reduces variability. The order below is designed to avoid loading the axle or trapping the cable, and to keep alignment correct before full torque is applied.
Step-by-step sequence (recommended)
- Dry fit + orientation confirmation: confirm wheel direction/rotation, cable exit direction, and clearance to brakes/guards.
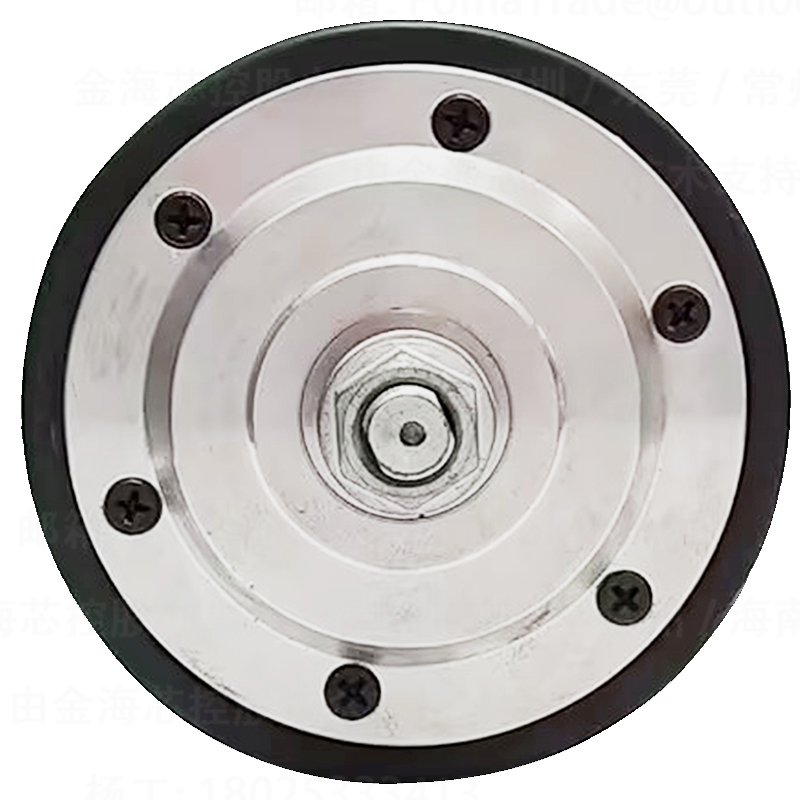
- Seat the axle/mounting faces: ensure full seating against the mating surfaces—no paint lumps, washers in wrong order, or debris.
- Install torque arm / anti-rotation features: the hub motor’s torque reaction must be mechanically constrained, not “trusted” to friction alone.
- Hand-tighten fasteners: bring all bolts/nuts to contact without applying final torque yet.
- Apply the correct fastening order (next section) to build even clamp force.
- Set cable routing and strain relief: lock-in the routing so it cannot rub on the tire, wheel, or sharp edges.
- Electrical connection: connect phase + Hall/encoder, check polarity/keying, and lock connectors.
- Pre-power checks: continuity and insulation screening; then low-speed commissioning.
Integration note for OEM documentation: define one standard washer stack, one threadlocker rule, one torque spec table, and one harness routing drawing. That alone can reduce training time for new assemblers by 25–40% in many plants.
The Critical Part: Fastening Order That Prevents Noise and Loosening
The fastening order matters because uneven clamp force can introduce small tilts at the interface. Under dynamic loads, that becomes micro-movement, which becomes noise, fretting, and eventually loosening.
A simple, repeatable tightening rule (works for most hub motor mounts)
Use a multi-pass approach and a cross pattern wherever you have symmetric fasteners. A typical production-friendly method is:
- Pass 1: 30% of final torque (cross pattern / alternating sides)
- Pass 2: 60% of final torque (same pattern)
- Pass 3: 100% final torque + marking paint (witness marks)
If your mount uses axle nuts, apply the same logic: alternate sides and avoid fully torquing one side before the other is seated.
Torque guidance (reference ranges, confirm with your drawing)
| Joint Type |
Common Hardware |
Typical Final Torque (N·m) |
Practical Note |
| Axle nut clamp |
M12–M14 class fasteners |
35–60 |
Alternate sides; use witness marks for audit |
| Torque arm bolts |
M6–M8 |
8–22 |
Prevent slip; re-check after first run-in |
| Accessory brackets |
M5–M6 |
4–10 |
Avoid over-torque into aluminum threads |
Reference only: final torque depends on grade, lubrication, joint design, and supplier spec. Always prioritize your engineering drawing and motor supplier instructions.
Electrical Wiring Rules That Prevent Intermittent Faults
Many “motor problems” are actually connection problems. A stable harness strategy is a reliability feature, not a cosmetic detail.
Wiring best practices (OEM-level)
- Separate power and signal: keep phase wires away from Hall/encoder lines when possible to reduce noise coupling.
- Strain relief within 80–120 mm of the motor cable exit (common practical target) to reduce bending at the grommet.
- Connector locking: use connectors with positive latching; add secondary retention if the application is high vibration.
- Ingress protection discipline: avoid placing connectors in direct splash zones; use boots and proper sealing where required.
- Pre-power screening: check continuity, and confirm no short to frame/ground before first energization.
Commissioning tip: low-speed first
Bring the system up at low speed and low load. Listen for cyclic rubbing, check for abnormal heating, and validate direction of rotation before enabling full torque. In many production test cells, a 3–5 minute low-speed run plus a quick fastener witness-mark inspection catches issues early without slowing throughput.
Fast Troubleshooting: Symptoms → Likely Causes → On-Site Checks
The table below is designed for technicians and line engineers who need to isolate the fault quickly, without over-disassembly.
| Symptom |
Most Common Installation Cause |
Quick Check |
Typical Fix |
| Clicking / squeaking under load |
Uneven clamp force; torque arm slip; washer stack error |
Check witness marks; inspect torque arm seating; verify left/right symmetry |
Re-seat, multi-pass tighten, apply approved threadlocker policy |
| Motor runs rough at low speed |
Hall/encoder connector not fully seated; pin damage |
Connector lock test; tug test; continuity on signal lines |
Re-seat/replace connector; improve strain relief |
| Overheating faster than expected |
Brake drag; misalignment; excessive side-load; poor airflow integration |
Spin-down time test; check rubbing points; measure current draw at no-load |
Correct alignment; remove drag; re-check mount geometry |
| Intermittent cut-out on bumps |
Cable rubbing; insufficient connector retention; wire fatigue near exit |
Inspect abrasion points; bend-test harness; check clamp spacing |
Re-route, add grommet protection, shorten unsupported spans |
| Controller error at start |
Phase/Hall mismatch; incorrect pinout; short-to-ground |
Verify pinout; check insulation to frame; review wiring diagram |
Correct wiring; replace damaged harness; re-test at low speed |
Real-World Installation Notes Engineers Actually Use
Common “silent” mistakes
- “It fits” but isn’t seated: paint thickness, burrs, or an incorrect washer can leave a small gap that becomes movement later.
- Harness as a mechanical support: if the cable is bearing load, failure becomes a matter of time—especially in vibration.
- Skipping witness marks: without marking, it’s hard to audit loosening during burn-in and shipping vibration tests.
- Assuming “one torque fits all”: different fastener grades and joint materials need different torque—define it in your BOM and SOP.
Why “no secondary machining” matters in production
When the hub motor system is designed to mount without reworking dropouts, brackets, or spacers, OEM teams typically see fewer tolerance stack surprises, better interchangeability between suppliers, and faster line balancing. Reducing machining steps also lowers the risk of geometry drift across batches, which is a common root cause behind noise complaints and inconsistent performance.
Printable Operation Checklists (Installation + Debug)
Installation checklist (line-friendly)
- Confirm motor orientation and cable exit direction
- Verify torque arm / anti-rotation feature installed and seated
- Hand-tighten all fasteners; apply cross-pattern multi-pass torque
- Add witness marks to critical joints
- Route cable away from moving parts; install strain relief
- Lock all connectors; perform tug test
Debug checklist (first power-up)
- Continuity check and short-to-frame screening before energizing
- Low-speed run (3–5 min) with no-load current observation
- Verify rotation direction and brake drag absence
- Listen for cyclic contact; check fastener witness marks after run-in
- Record controller logs/errors for traceability
Why OEMs Standardize with WWTrade (Reliability + Delivery)
For equipment makers, the best hub motor is the one that installs consistently across batches, passes testing predictably, and stays stable in customer hands. WWTrade supports integrators with documentation-friendly installation guidance, practical troubleshooting support, and production-oriented coordination so teams can ramp faster and ship with confidence.
Get the 8-Inch Hub Motor Installation Pack (Fastening Order + Wiring Checklist + Debug Flow)
If your team is integrating an 8-inch (200 mm) hub motor into a new platform—or cleaning up recurring noise/heat/loosening complaints—request the engineering-ready materials and integration support.
Request 8-Inch Hub Motor Installation Support from WWTrade
Typical response time for technical clarification and integration questions: within 24–48 business hours (project-dependent).


